Tips for mastering veterinary dental radiography
To consistently obtain diagnostic intraoral radiographs, keep these important points in mind.
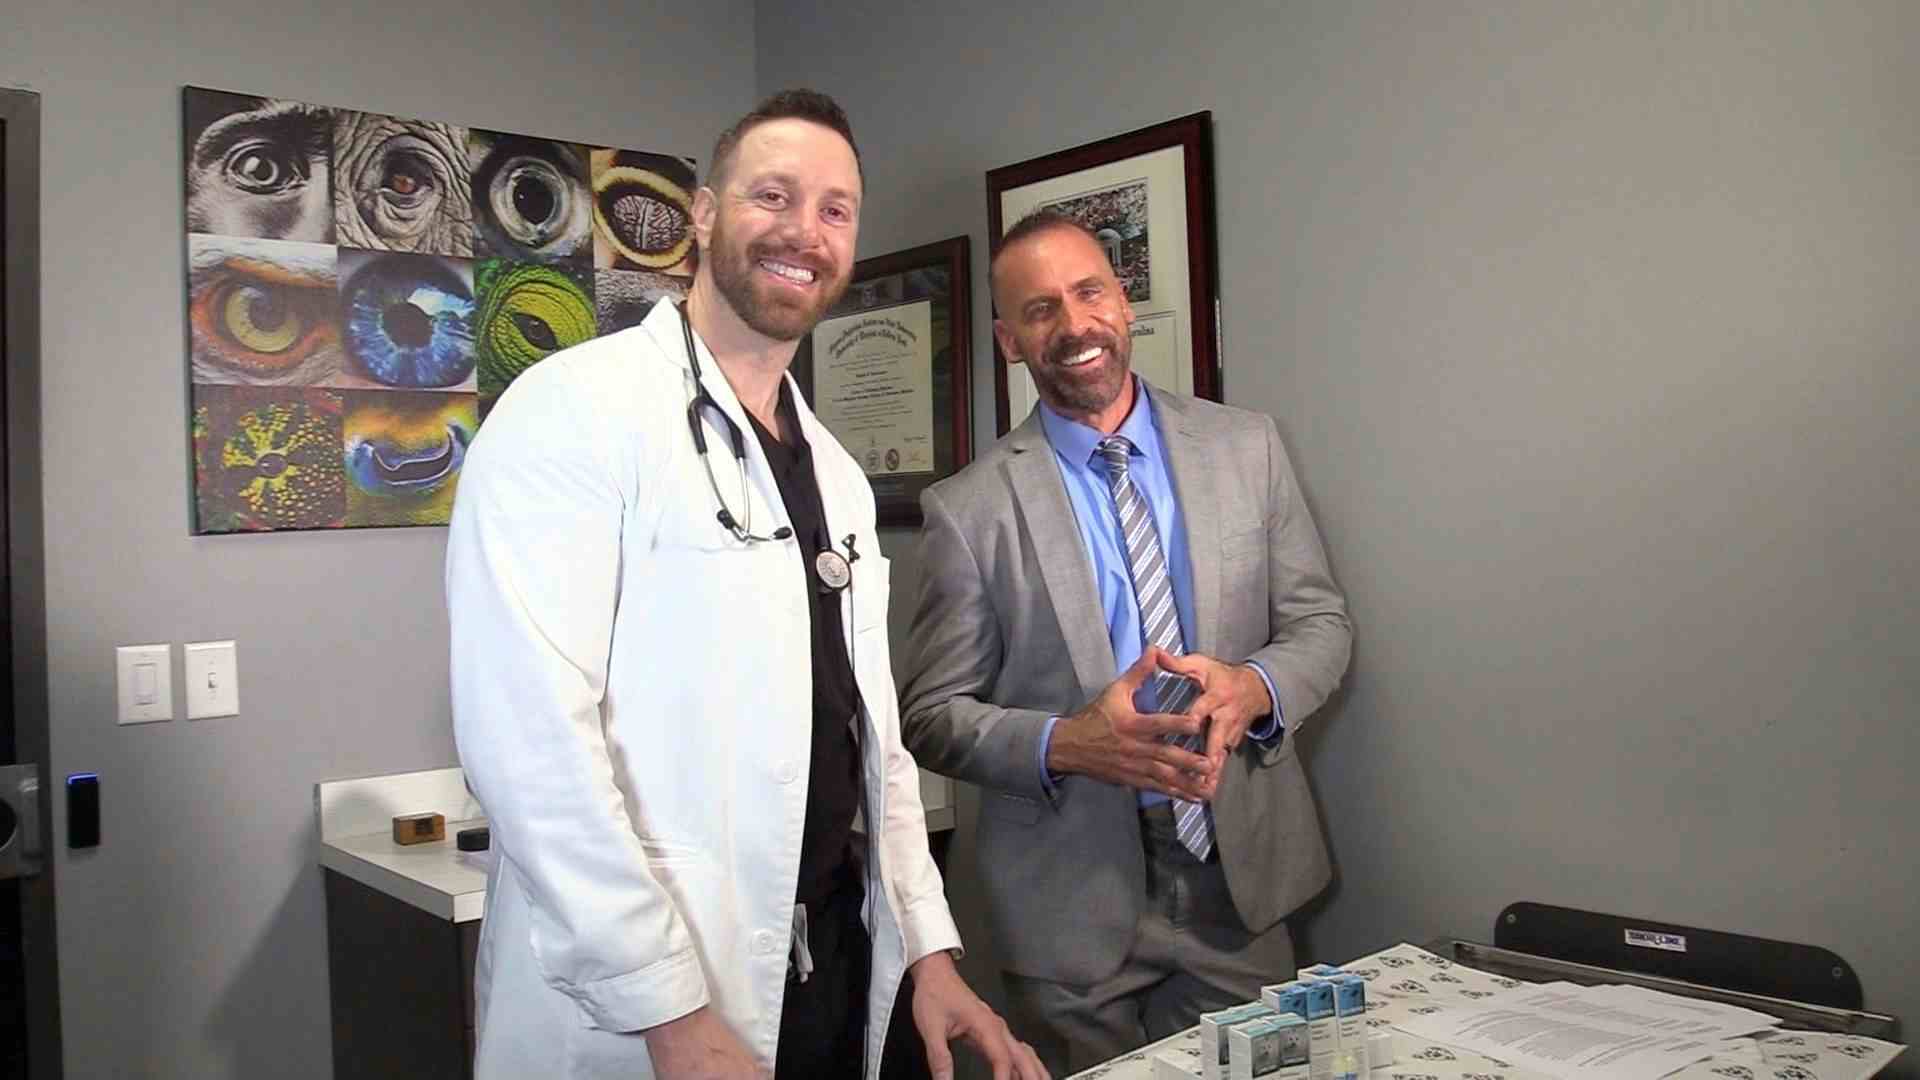
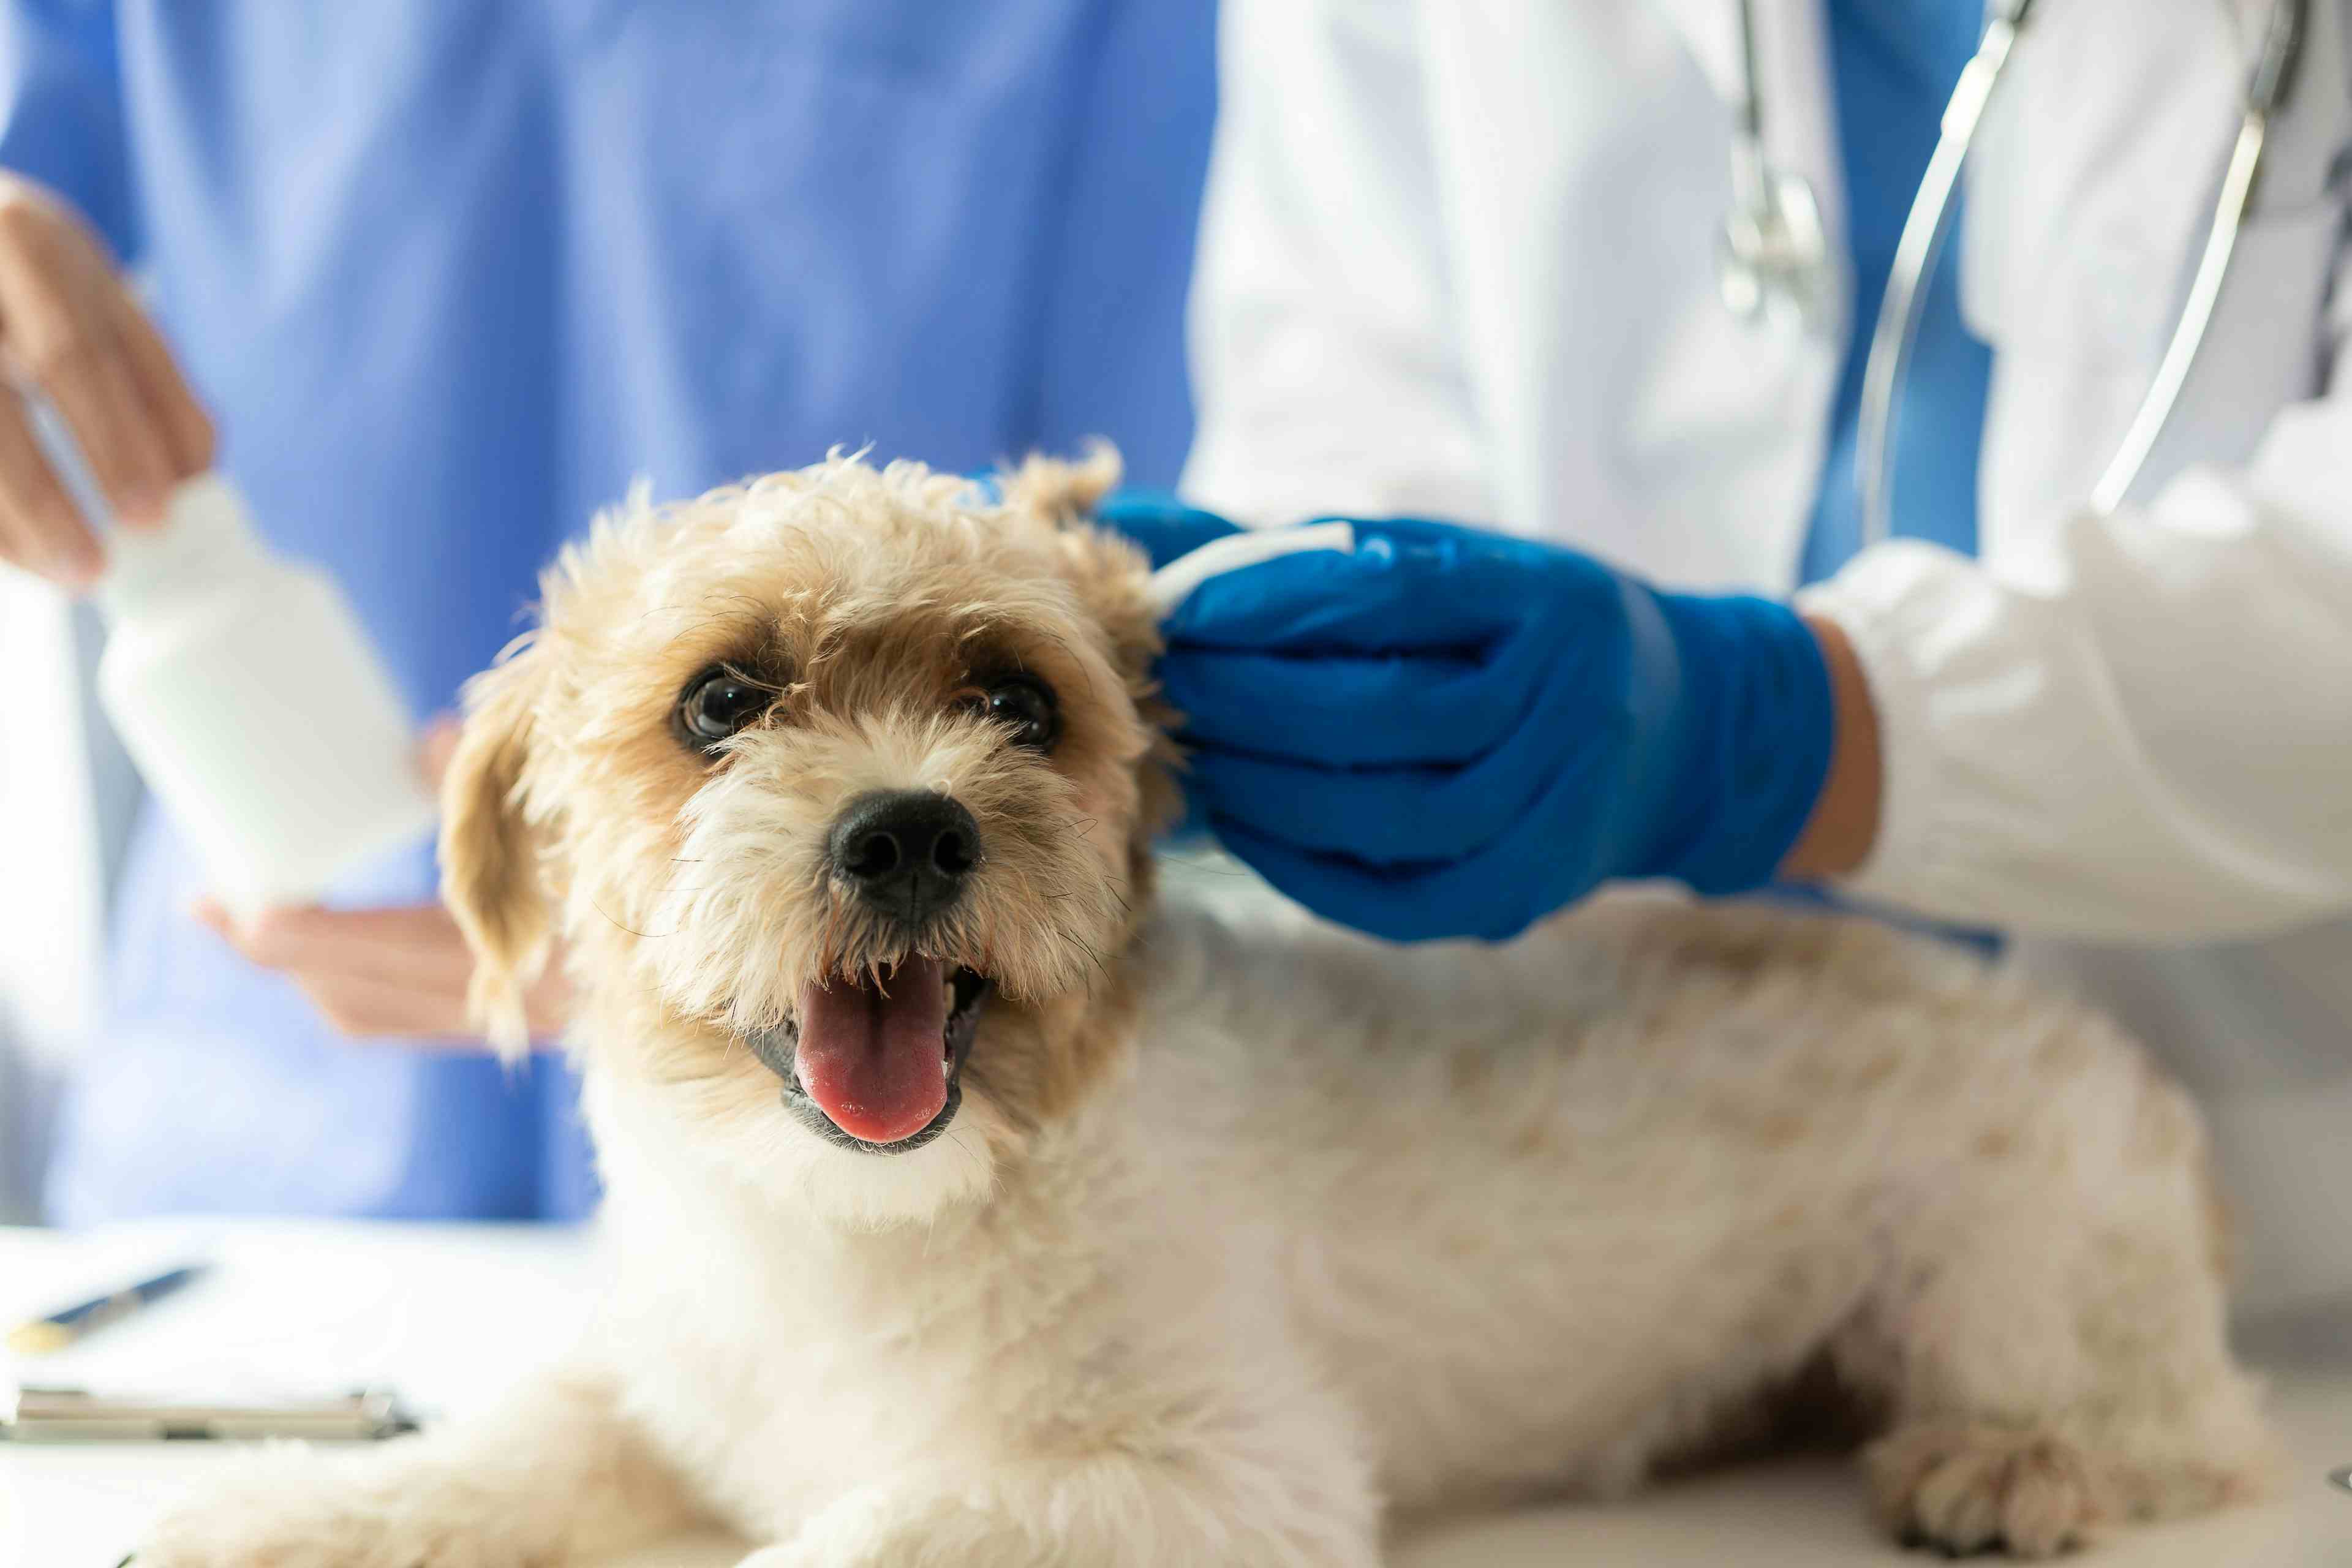
Obtaining a full-mouth series of dental radiographs can seem daunting for many veterinary technicians, especially in hospitals that do not incorporate the practice into daily routines. The easiest and fastest way to master the techniques required to produce diagnostic-quality radiographs is through in-person professional training. A veterinary technician with specialty certification in dentistry is a true expert with the education and experience to help your team succeed without the fear and frustration of practicing on anesthetized patients (Figure 1). In addition to helping your team learn the simplest positioning techniques, this person can help ensure that all team members are on the same page regarding client education, workflow during procedures, and interpretation of the images once obtained.


Figure 1. The author (right) instructs a team at Olde Town Animal Medical Center in Longmont, Colorado, about positioning for dental radiology.
Training for dental radiography is best done on specimens or bone skulls to ensure a quality learning experience without the stress of caring for a live animal. We learn best from our mistakes; however, let’s not make them with a patient under anesthesia if at all possible.
Timing
Obtain the full-mouth series of radiographs early in the procedure, immediately after the patient is anesthetized and stabilized. Doing so helps get the diagnostic process started with some objective data.
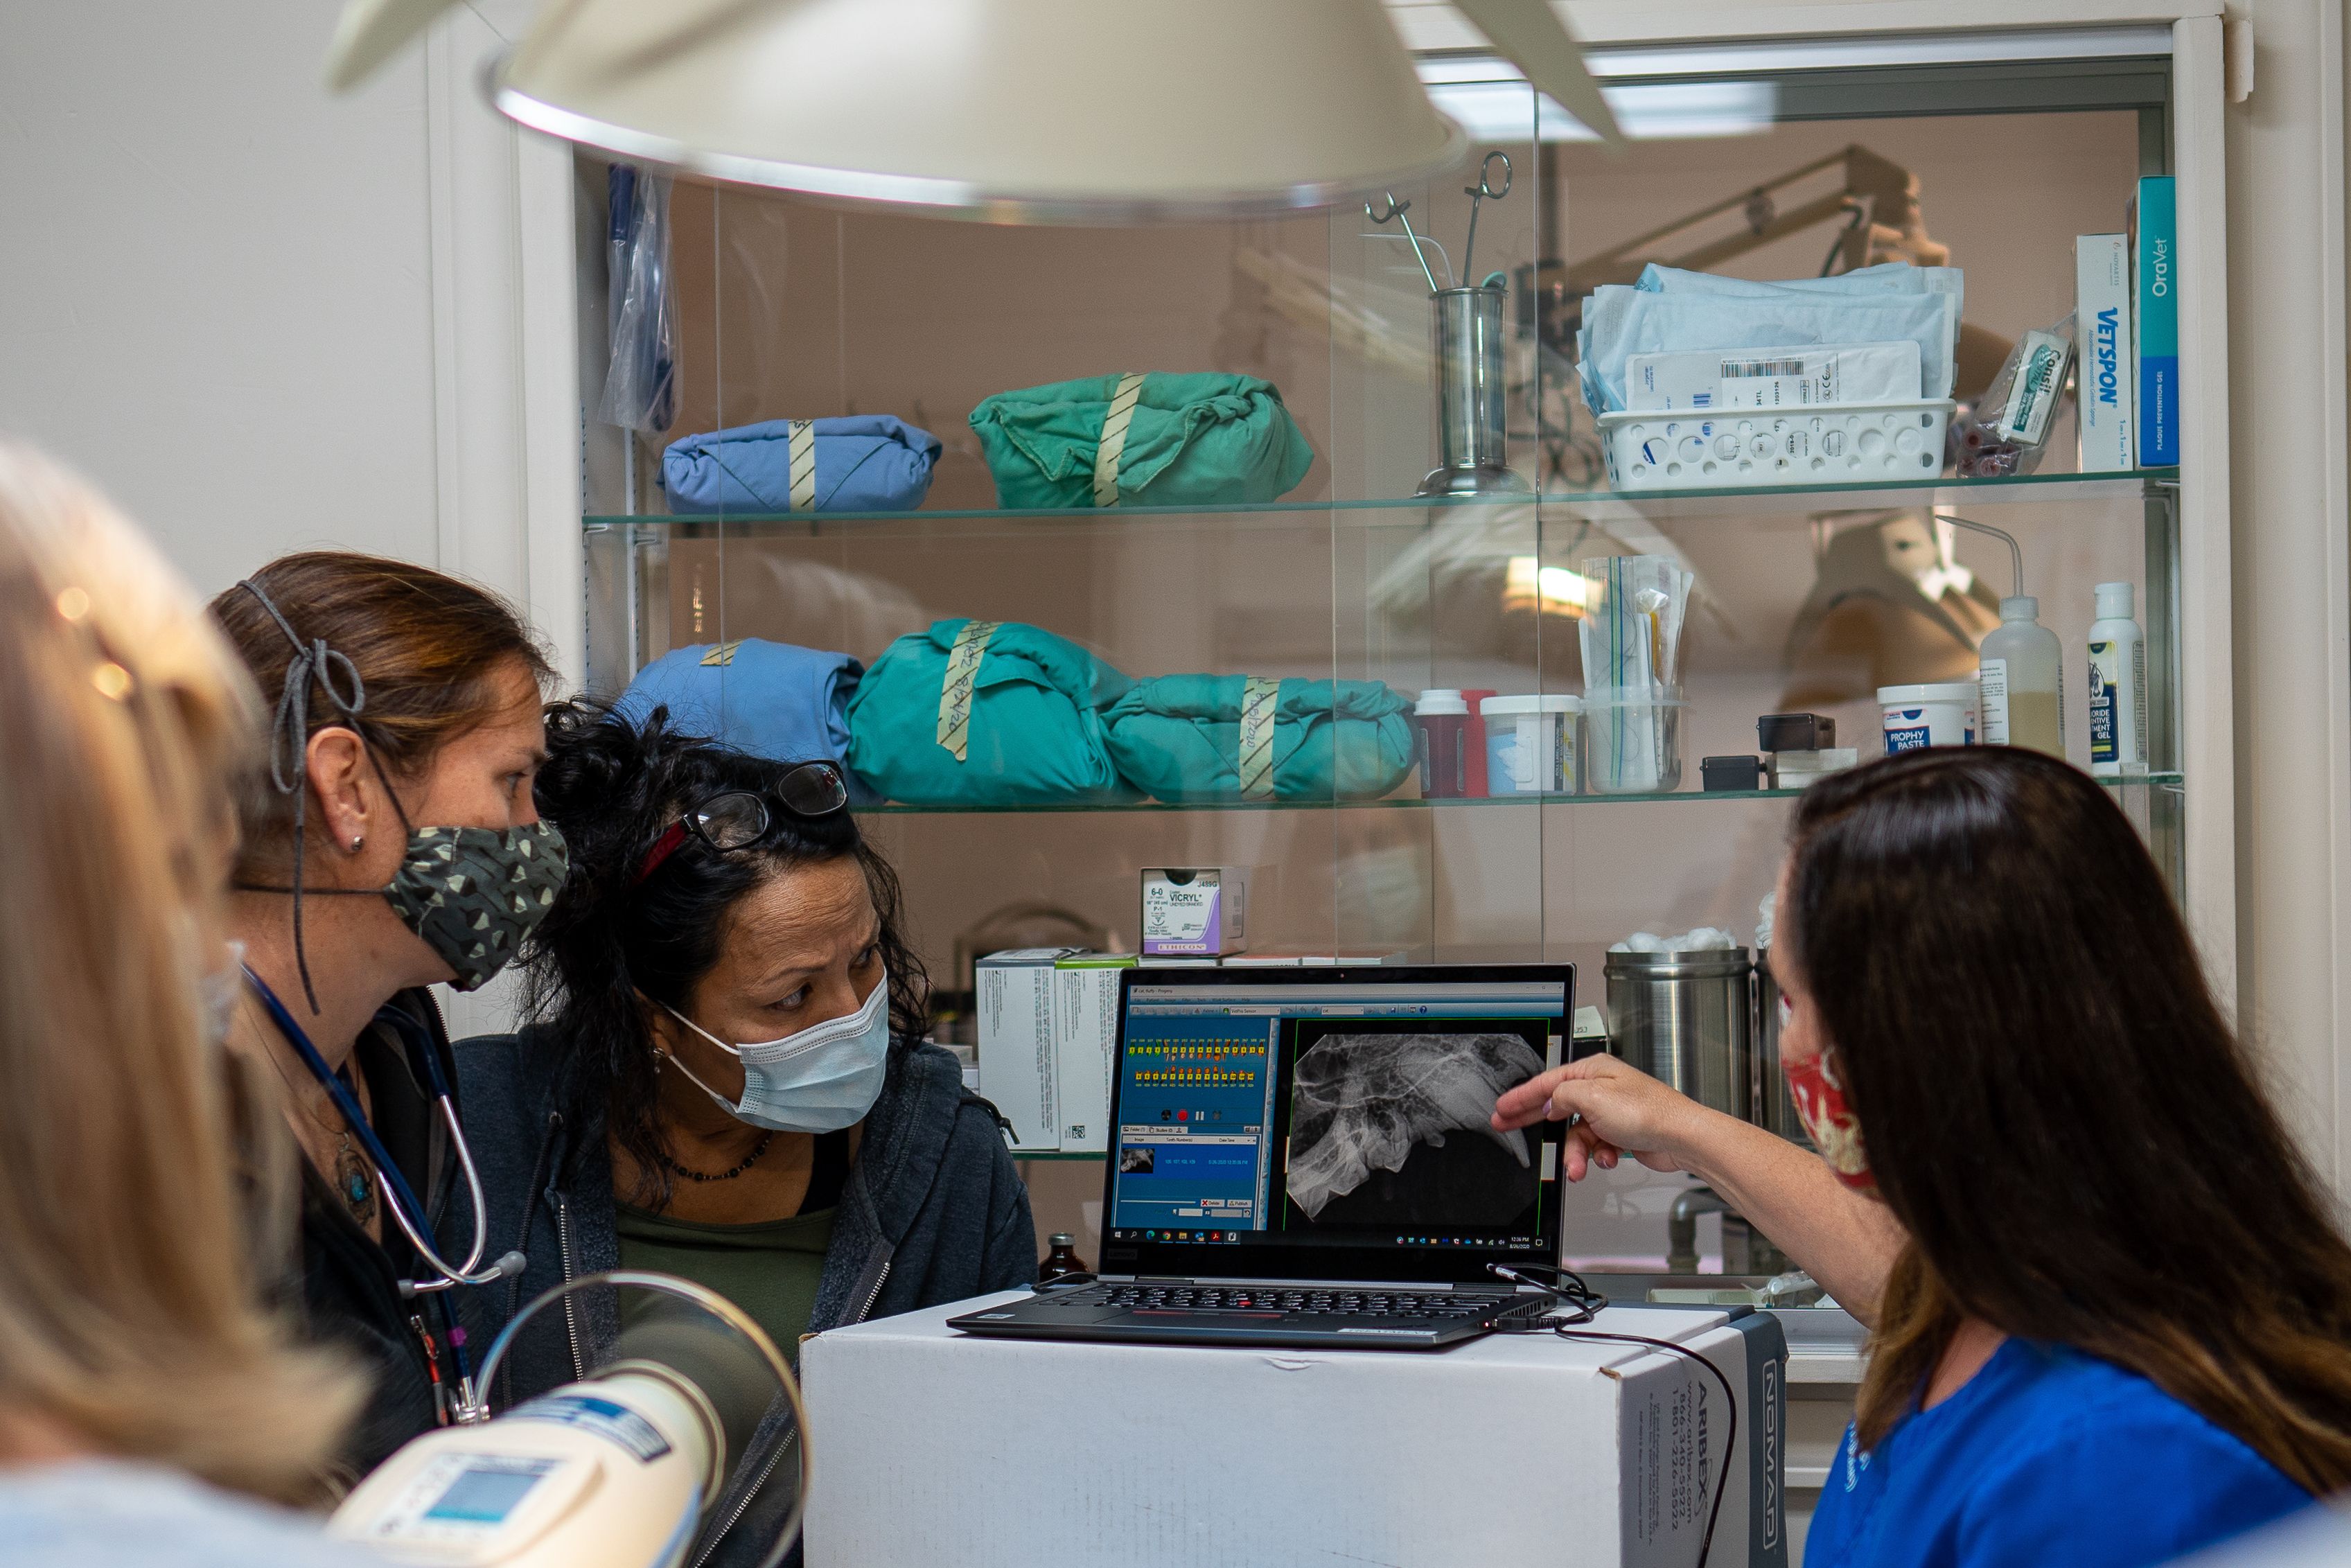
Once you have the radiographs, you will likely find more pathology and need to call the client for treatment approval. If you wait to obtain radiographs until everything else is done with the patient’s mouth and the client doesn’t answer when you call for treatment authorization, the patient’s time under anesthesia may be extended unnecessarily.
Patient positioning
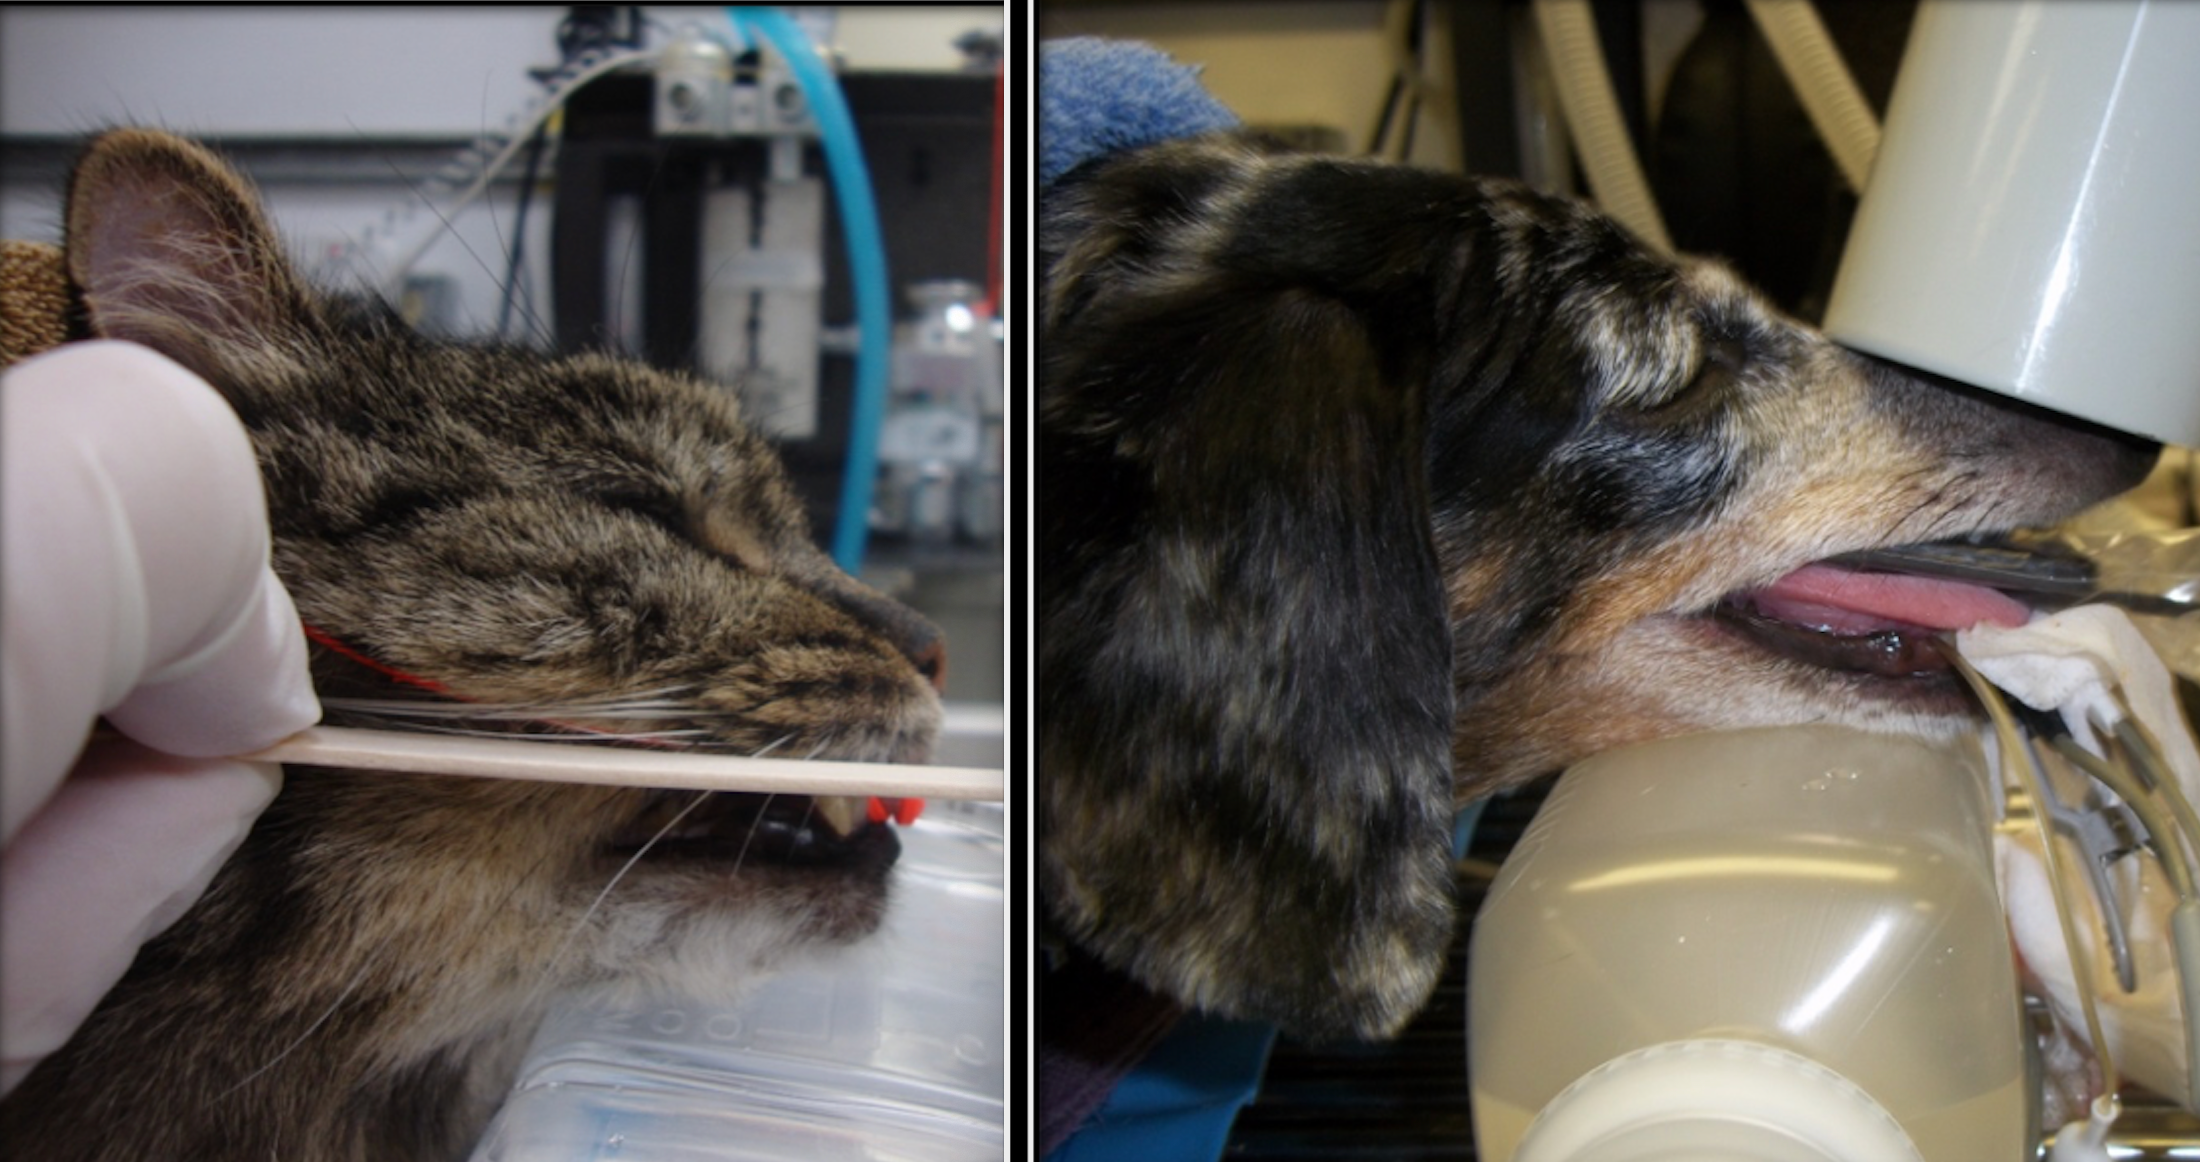
Patients should be positioned in the same way each time a radiograph is obtained. With sternal and dorsal head positioning, ensure that the patient’s hard palate is parallel to the tabletop (Figure 2). If you wish to obtain the radiographs with the patient in a lateral head position, make sure the hard palate is perpendicular to the table. I prefer to obtain full-mouth dental radiographs with the patient initially in sternal positioning for the maxillary views and then in dorsal recumbency for the mandibular views.


Figure 2. Proper palate-parallel head positioning for oral radiography. Note that the hard palate of each patient is parallel to the tabletop.
Achieving consistent results can be very challenging if you are not using these specific patient head positions. If the patient’s head is oblique (not straight), you must position the beam using bisecting angles, a method many find troublesome, time-consuming, and prone to error.
Don’t depend on any one view to determine the presence or absence of pathology if something seems questionable. When you are unsure about what you may be seeing, obtain a second or even third view from a different horizontal perspective than the original survey view of that tooth or area.
Anesthesia safety
Analgesia and anesthesia are critical when obtaining dental radiographs. Make sure the patient is adequately premedicated and then maintained under a surgical plane of general anesthesia (ie, unable to respond to stimuli) for the entire procedure.
Avoiding sensor damage involves having an exceptional understanding of analgesic principles and how to determine a patient’s depth of anesthesia properly, observing constantly and adjusting depth accordingly while preventing hypotension and other complications. Do not place the sensor in the mouth of a patient that is not fully anesthetized and intubated.
A patient’s jaw tone and reflexive mouth closure can cause significant destruction of the sensor. To avoid sensor damage, particularly by dogs, wedge a bite-block object—such as an old section of endotracheal tube (larger size for dogs) or a dental wedge—between the molars on at least 1 side of the mouth. This will prevent an unexpected bite down by the patient (Figure 3).
Efficiency
Once you have training and a repeatable technique, your speed will improve. But at first, prioritize technique over speed. Dental radiographs must contain the tooth or teeth and bone surrounding them as desired; there must not be elongation or foreshortening distorting bone or tooth. Some parts of mouth (eg, tooth root, alveolar bone) cannot be seen with the naked eye. These, in particular, are of the utmost importance. With practice, you will be able to expose about 1 image per minute and, with daily practice on every dental patient, every time, you will become even more efficient and consistent.
Troubleshooting
It’s important to have a thorough understanding of what can cause problems when obtaining dental radiographs. This comes down to 3 variables, which I call the ABCs: A—animal, B—beam, and C— sensor, phosphor plate, or film.
The operator must objectively measure each of the 3 ingredients in the formula to get consistently diagnostic radiographs. When you get an image that isn’t diagnostic, ask yourself what caused the error. Was it the animal’s head position (A), the beam’s angle or rotation (B), or the sensor’s location in the mouth (C)? When you determine what caused the issue, fix that and try again (Figure 4).

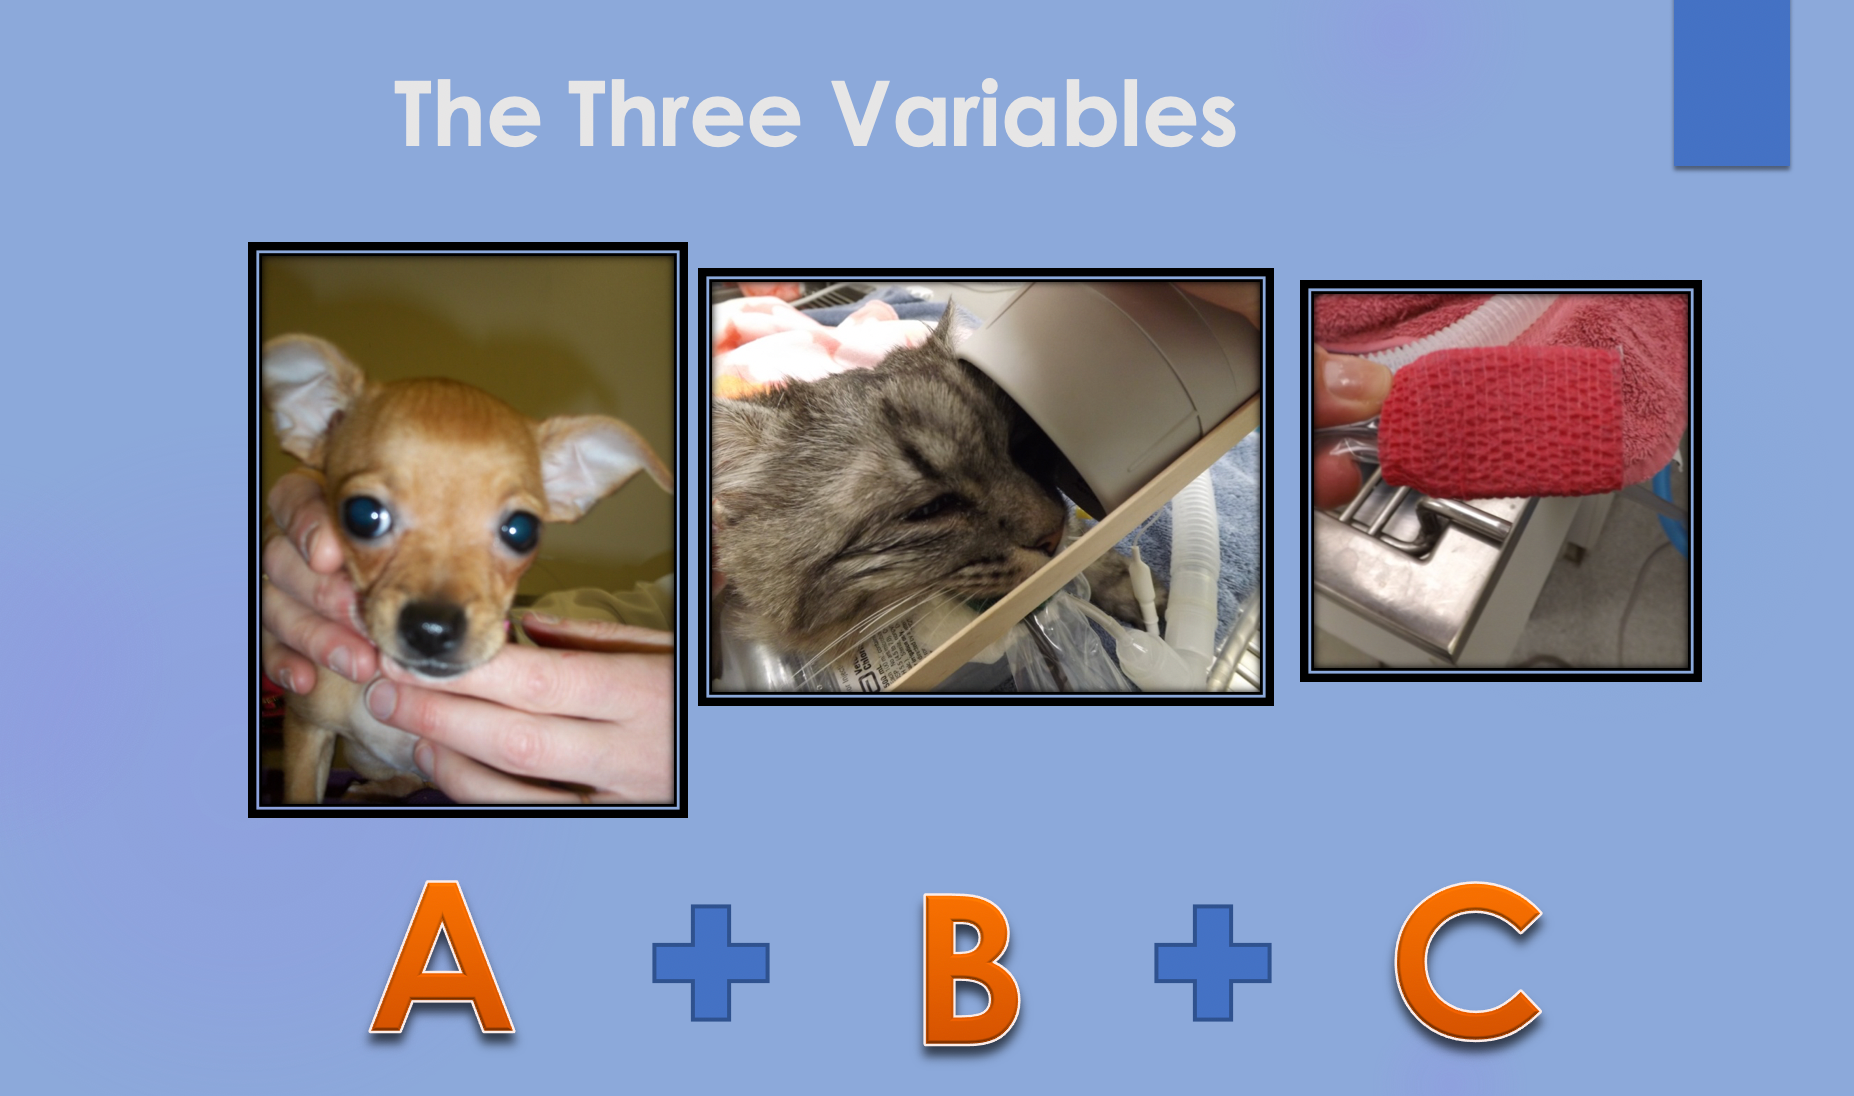
Figure 4. The ABCs of dental radiology. To ensure a diagnostic dental radiograph, positioning of the animal (A), beam (B), and sensor (C) must all be accurate.

The bottom line Learning dental radiography is challenging, but don’t give up. Becoming proficient involves at least 1 serious learning opportunity, practice without added stress or pressure from your team, and ongoing evaluation of what is working well and what you still need to learn and practice more.
Benita Altier, LVT, VTS (dentistry), began her business, Pawsitive Dental Education, with the goal of bringing professional dental instruction to veterinary hospitals and conferences across the United States and Canada. She currently resides in Washington.